Agent workspace
Handling a ticket
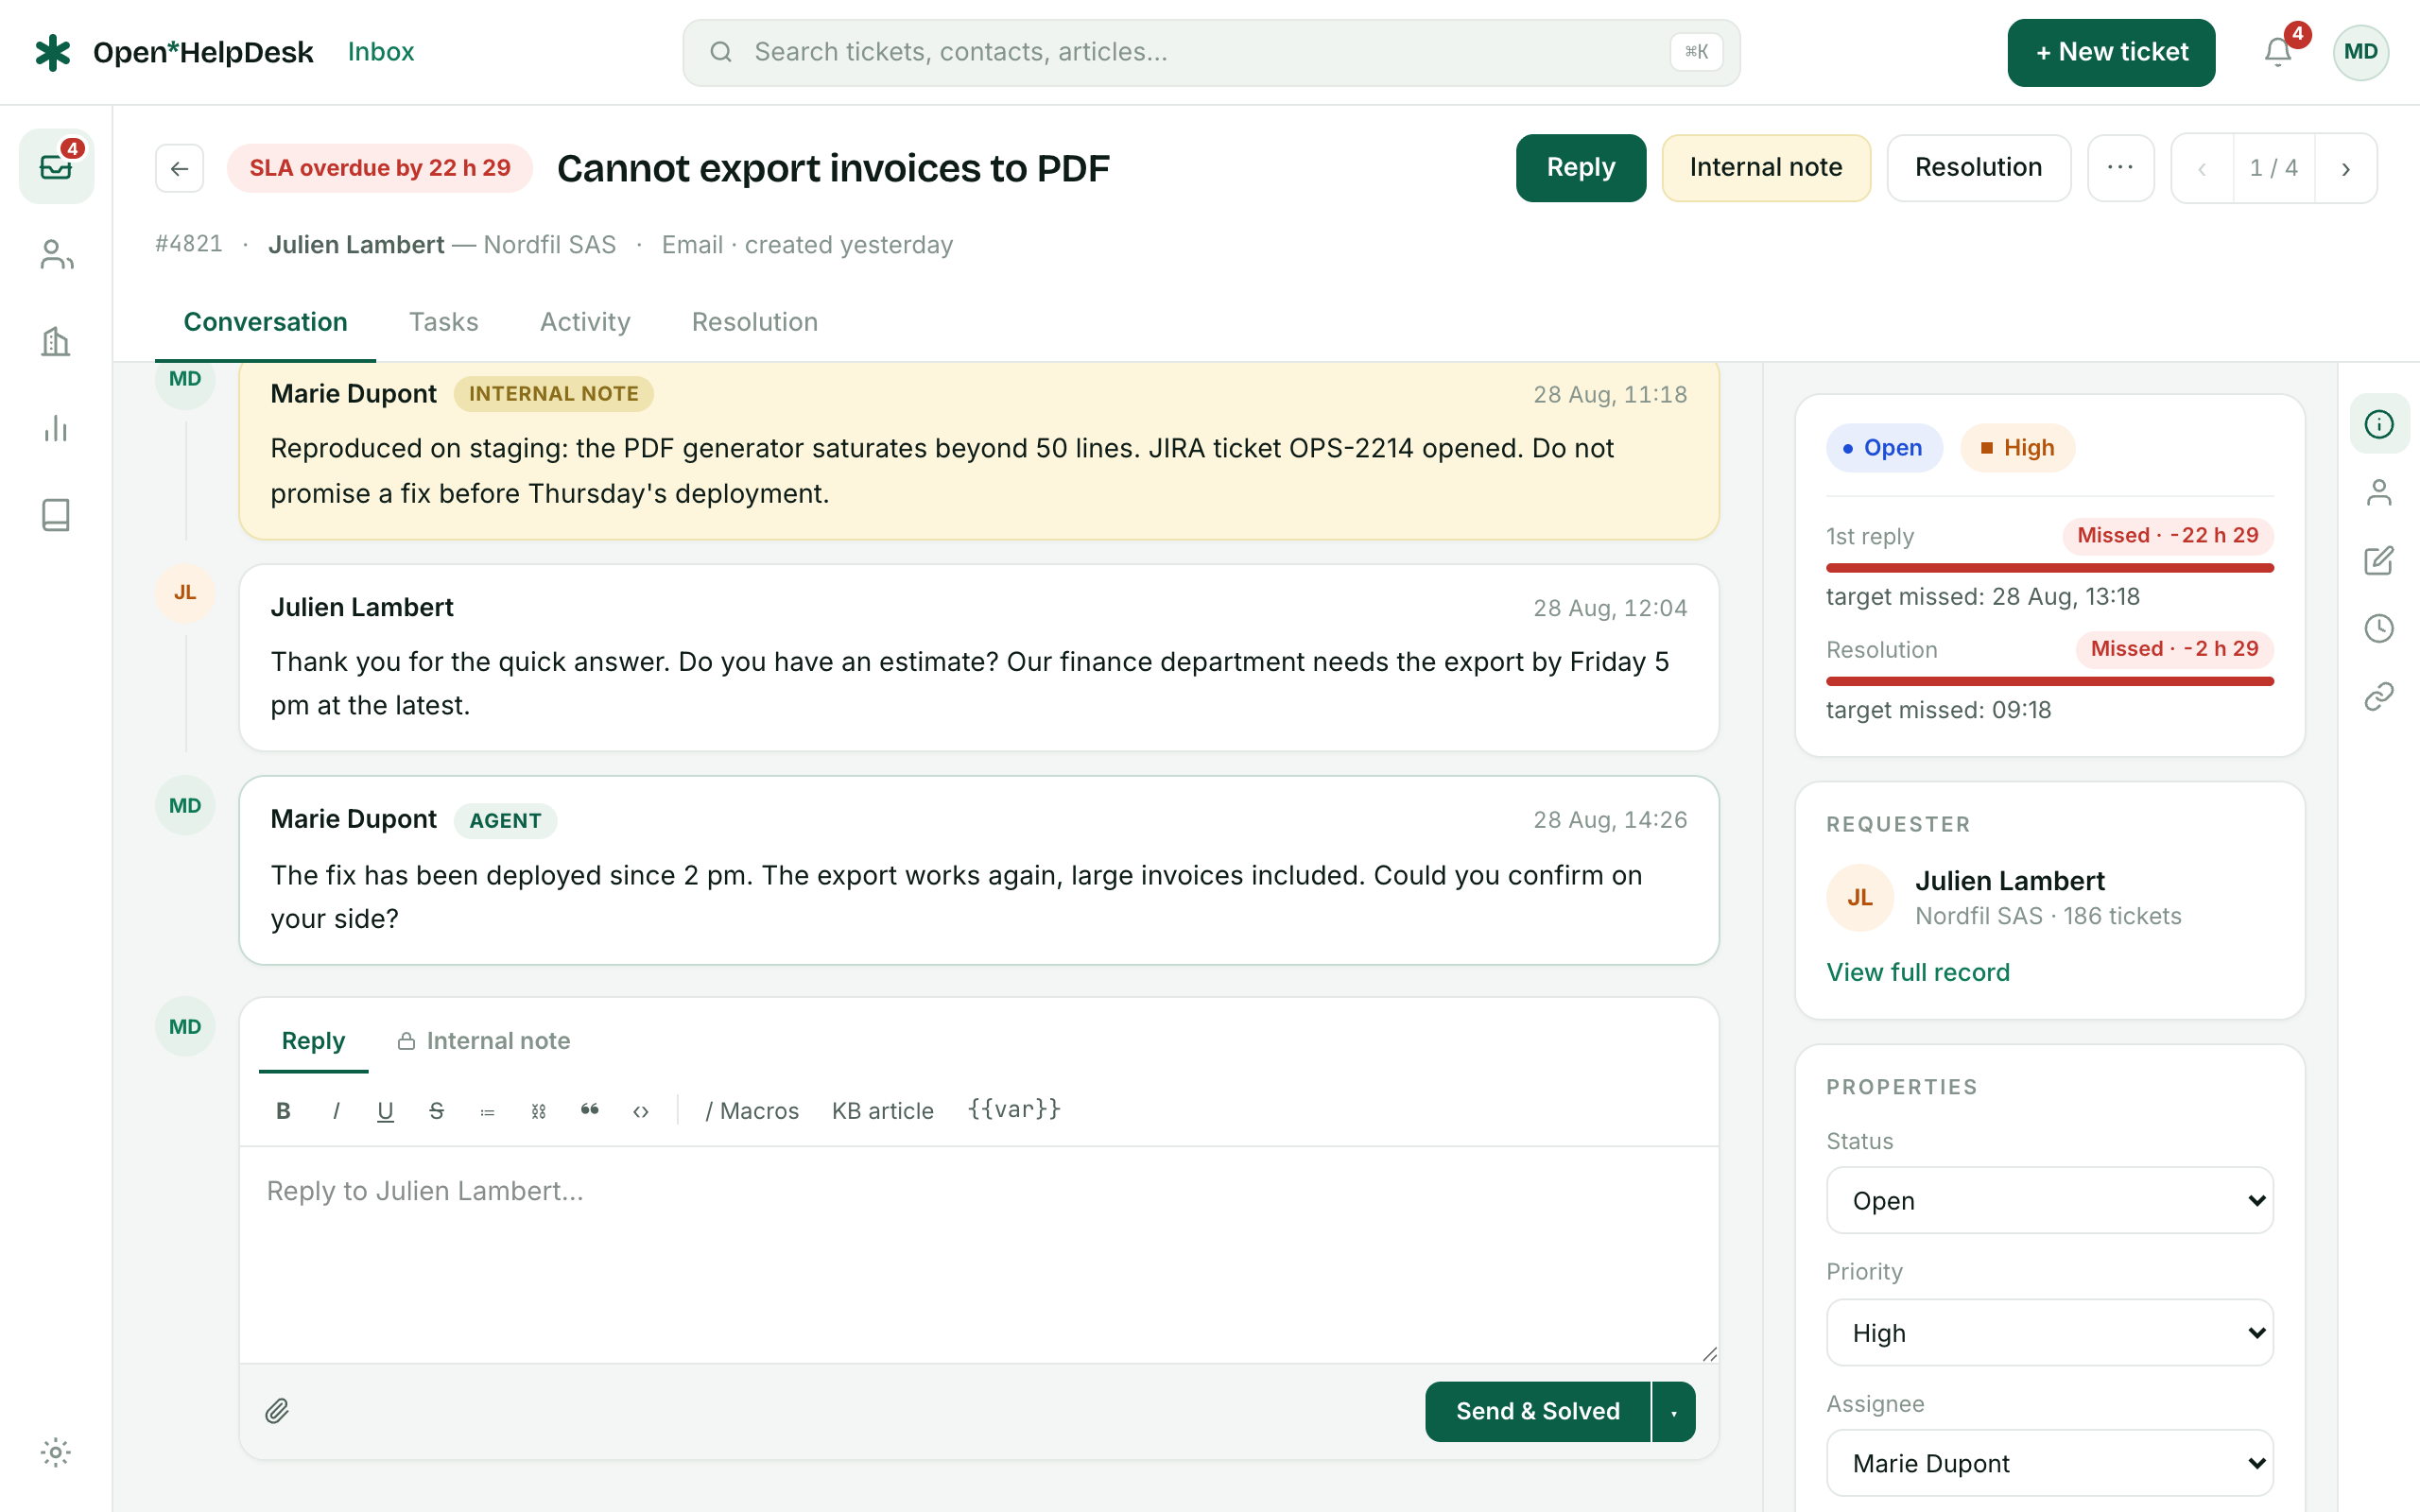
Open a ticket and the screen splits in two: the conversation on the left, and everything you can change about the ticket on the right. Almost all of your work happens in the composer at the bottom of the thread.
The thread
The thread reads top to bottom in the order things happened. The customer’s messages sit on the left; your public replies sit on the right; internal notes stand apart with a lock and their own tint; and system events — an assignment, a merge — show as thin centered dividers. Attachments hang under the message they came with.
The header above the thread carries the status, priority and channel, a live SLA countdown, and ← → arrows that step through the tickets of the view you came from, with a “ticket X of Y” position so you always know where you are in the queue.
Public reply vs internal note
The composer has two tabs. Reply writes a public reply: it is emailed to the customer and becomes part of the conversation they see. Internal note writes a note for your colleagues only — it is never emailed, and it shows in the thread with a lock and the placeholder “Note visible to agents only”.
The split reply button
On the Reply tab the send button is a split button: the main part reads Send & Solved, and the arrow beside it lets you choose what happens to the ticket after you reply — mark it Solved, set it to Waiting, reopen it, or send without changing the status. One click both answers the customer and moves the ticket along.
Sending a public reply also stamps the first-reply time the SLA is measured against, and emails the requester. The Internal note tab has no split button — just an Add note action that leaves the status alone. Whatever you type is saved as a local draft as you go, so a stray refresh does not lose it.
Macros
The / Macros menu in the composer toolbar drops a saved response into the message. A macro is more than canned text: it can carry variables such as {{contact.name}} and {{ticket.number}} that fill in for the current ticket, switch the composer to a reply or a note, preset the status the reply will apply, and — when you send — change the priority, team, assignee or tags in one go. Applying a macro sets up the message; you still send it yourself.
The properties panel
The right column is where you classify the ticket. The Assignment group sets the assignee and team; the Classification group sets the priority and type, shows the read-only channel, and lists the tags. Each change is saved the moment you pick it — there is no separate save button. Below sit the SLA rows (first reply and resolution, each shown as Met, Missed or Due) and the contact record with their recent tickets. The status of the ticket itself is driven from the reply button above, not from this panel.
Merging tickets
When the same request arrives twice, use Merge in the header. Enter the number of the ticket to keep, and the current ticket is closed and attached to that target: a system note is written on both tickets to record the link, and you land on the target. The merged ticket stays readable, but read-only.
Once a queue is under control, the reports show how it is trending.